Welcome to the first in a new series of articles. These articles are aimed at improving the IQ (Image Quality) of our cameras. Today's topic is blurring.
Intro
we all know that feeling... coming home to find your shots all blurred!
One of the most common problems with images is that a lot of them tend to come out blurry. We all know that feeling... you think you've taken some great pictures, and couldn't wait to see them larger, share them with friends, maybe even print a few. To your disappointment; you find out later that they're blurred! Sadly, there is no real magic fix to image blur. There are 3 major types of blur that can ruin any photograph.
Types of Blur
-
Camera Shake
This is by far the most common type of accidental blurring in a shot. Thankfully it's also easy to solve, or at least reduce. It typically looks “shaky” for want of a better word. There might even be streaks of the lighter parts of an image, or even a “double image” sometimes.
CAUSE: Too long a shutter speed and, as is most often the case for bad images... bad technique by the photographer - (“What?? How can it be? Surely it's my camera!!”). You need to analyse your camera's settings before you take the photo.
as is most often the case, it's caused by bad technique
SOLUTION: There are a number of ways in which you can prevent camera shake. Most notably is to get yourself a tripod, and more importantly, use it. I know many people who have tripods at home yet still complain of blurred photos due to camera shake. If you don't have access to a tripod, try steadying yourself against something like a wall, or a tabletop. Breathe slowly and surely to slow down your heart beat and less the chances of shake.
Another solution is to change the exposure settings to allow more light. Very often you'll get camera shake due to low light and/or non-optimal settings. Oh and another thing. If you can, invest in some gear which has image stabilisation. This will help with steadying the image, especially at longer focal lengths.
The most obvious way to allow more light in is to create more light - by using a flash. This won't always work and can cause some nasty effects on your images. The best way let more light in without losing the natural lighting is to:
— Increase your ISO sensitivity (e.g. ISO 100 to ISO 400)
— Open up your aperture (give it a smaller number e.g. from f/4 to f/2).This will admit more light through the lens, resulting in shorter exposure times and sharper pictures.
-
Out of Focus
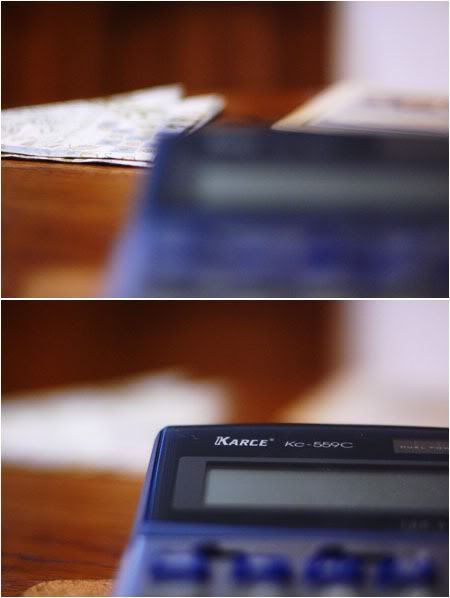
This is when the main subject is not sharp enough compared to the rest of the image. This is different from camera and/or subject movement because it involves the use of focus and not motion to determine sharpness.
CAUSE: This comes from either the automatic focusing of your camera, or the manual focusing by you. When you're manually focusing, it's hard to get it perfect, and often you'll miss by only a bit, but this will still be enough to render your subject much softer than you intended. When using autofocus, it's pretty hard to ensure 100% accurate focus, but still easier than with manual focusing.
pay attention to how the focus plane moves when you turn that 'ring back and forth...
SOLUTION: When manually focusing, make sure that you pay attention to any focus aids present. Nikon SLRs have a green dot which lights up when the subject is perfectly focused. When manually focusing in live view, many cameras have a magnification option, which magnifies the image quite a bit to ensure critical focusing. Pay attention to how the focus plane moves when you move that 'ring back and forth. Also, take multiple shots at slightly different focus distances if you can't be perfectly sure.
When using autofocus, make sure that your subject is over the correct focus point e.g. the centre. Make sure that the AF has enough light and contrast to work with - a common sign is when the camera starts “hunting” to achieve focus. In this case either switch to manual focus or move the focus point to an area which has enough contrast — NOT white walls, for example.
-
Motion Blur
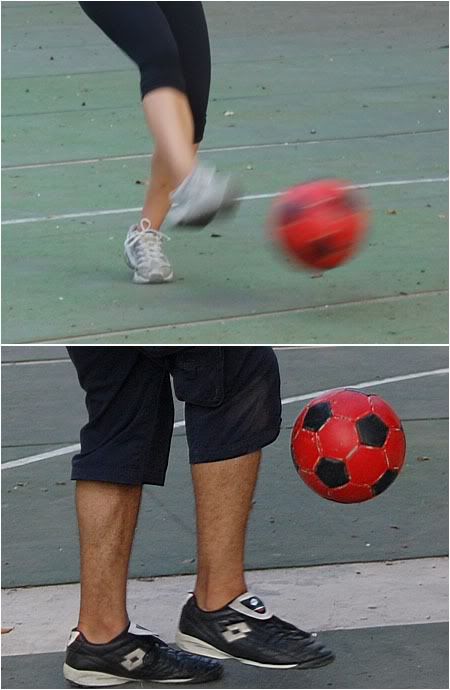
Perhaps the hardest type of blur to control. This is directly related to shutter speed. It is when a moving subject is too quick for the selected shutter speed and is rendered as a blur.
CAUSE: When light levels are low, or the subject is very fast, the subject is rendered as a blur. This is due to the shutter speed not being fast enough. Image stabilisation and tripods are NOT going to help you here. They can only deal with camera shake.
set your shutter speed to around 1/500 for sports — preferably even faster
SOLUTION: Increase your shutter speed to around 1/500 for sports — preferably even faster. Sports players move extremely quickly and it's important to capture them sharply. For people (portraits, party shots etc) try to stick to around 1/60. You can go down to 1/30 if you ask them pose, but watch out for camera shake in this case. If you don't have the necessary light think about increasing your ISO speed or opening up your aperture.
Additional tips
Don't be happy with just one shot. Keep shooting repeats! Digital is free. While in one shot they may be moving, in another they might be still. Time your shots for when they won't be moving as much if possible. Pay attention to your shutter speed settings to avoid motion or camera shake. Also, look at your LCD for some feedback on how you're doing. It's essential to zoom in to really check if you nailed focus and to check for signs of movement. Finally, while blur can be used to make a good photo, more often than not it's an image defect and not a 'feature'.
That's it for this edition of IQ. I hope you learnt something, see you another time!


0 comments:
Post a Comment